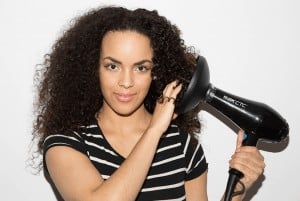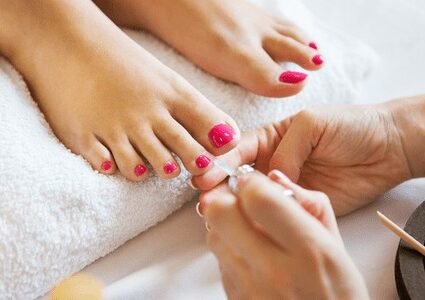
Pedicure at home
A pedicure is a therapeutic therapy for our feet it will help remove dead skin cells, remove dust dirt, and also soften hardened skin around your heel. Pedicure centres around feet care, by upgrading the looks and nearness of the feet and the toenails. It can likewise be called a nail treatment, however for the feet. A pedicure is a fundamental strategy to keep the feet spotless and sound and liberated from the danger of getting conceivable nail contaminations just as nail sicknesses. Pedicure utilizes a cleanser like structure known as a pumice stone which is utilized to delicately and viably scour off the dead cells on the base of the feet.
In this way, the procedure of pedicure keeps up the characteristic excellence of the feet by shielding it from clutters and residue particles entering the hole in the skin and nail beds.
How to do pedicure at home?
Giving yourself a pedicure at home naturally/with natural ingredients is not a hard task. It is rather easy. Sometimes, it happens that you need to set aside cash, or always visiting a salon from your busy schedule is not possible, or don’t feel 100 percent safe going to one regardless of whether they are open in your town, you’re more than fit for giving yourself an excellent pedicure at home with natural ingredients.
So, let’s discover some of the easy ways to do a pedicure at home with natural ingredients as per your comfort.
Pedicure kit at home
If you are not able to go to a nail salon for a pedicure and want to give yourself a pedicure at home naturally, you can easily make a pedicure kit at home for yourself with some pedicure tools. Making a pedicure kit at home is easy as most of the pedicure tools required to make a pedicure kit are easily available at home. If these tools are not available with you at home, you can easily buy them online. But make sure that you have to remove acrylic nails before doing this
Things you will need to make a pedicure kit at home –
• Tub of warm water
• Bath salt/rock salt/shampoo
• Foot scrub
• Nail clipper/cutter
• Cuticle pusher
• Cuticle nipper (optional)
• Pumice stone/foot file
• Nail filer/scrubber
• Nail polish remover
• Cuticle cream
• Moisturizer
• Cotton pads
• Dry towel
• Nail buffer (optional)
• Toe separator (optional)
• Orangewood stick (optional)
• Callus remover/ feet scraper (optional)
The best part about making this pedicure kit at home is that you can add or remove some tools according to your requirements. For example, the Orangewood stick is really handy to use but if you don’t have this at home or if you are not sure how to use it, you have the option of eliminating this tool from your homemade pedicure kit.
Some of these pedicure kit tools are described below in detail
- Cuticle pusher

This tool is utilized to push the skin from your nails back and away. For extreme, hard skin around the nails, it’s ideal to utilize a steel fingernail skin/cuticle pusher. For delicate fingernail skin, utilize a wooden one.
- Cuticle nipper (optional)

A fingernail skin nipper is an instrument that is utilized to manage to hangnails, intense fingernail skin, and the dry skin around your nails. You have the option to eliminate this tool from your pedicure kit if you want.
- Pumice stone/foot file

A pumice stone is utilized to expel the peripheral layer of dead skin cells.
- Nail filer/scrubber

This pedicure kit tool is utilized to delicately granulate down the edges of your nails, making them smoother and helping you in forming them.
- Nail buffer (optional)

This tool is mainly utilized to clean your nails and give them a steady look.
- Toe separator (optional)

This tool is placed between your toes so that you can put nail polish or use any other tool without any difficulty.
- Orangewood stick (optional)

This tool is very handy and can be used for quite a few things – push back fingernail skin, wipe out any soil, or even fix nail clean blunders.
- Callus remover/ feet scraper (optional)

A callus remover productively disposes of dry, dead, and harsh skin from your impact points to uncover milder, smoother skin.
Pedicure at home steps
Pedicure at home can be done in some really easy steps. So, for a pedicure at home naturally follow these simple pedicures at-home steps. Let’s see the steps involved in a simple yet easy pedicure
1. Cleaning or removing the acrylic nail (Nail polish removing)
2. Trimming your toenails
3. Nail shaping-file your nails as per your choice
4. Soak your feet
5. Scrubbing and exfoliating your feet
6. Moisturize your feet
7. Massage your feet
8. Glam your nails
9. Cleaning up all the mess and smudges
Let’s see pedicure at home steps in a little bit more detail
1. Cleaning or removing the acrylic nail (Nail polish removing)
This is the most basic and the first step for any pedicure at home. For any pedicure at home naturally, cleaning your toenails is very important. Along with cleaning your toenails, this step also includes removing already applied nail polish. You can remove already applied nail polish with the help of a cotton pad and a polish remover. A huge range and variety of nail polish remover are available in the market, Go and explore as per your choice. If you don’t have cotton pads at home or are not able to go and buy cotton pads from the market, you can always use a dry towel in place of cotton pads. The important point to remember while cleaning your toenails and removing already applied nail polish is that cotton pads or towels should be properly cleaned and dried before using. These cotton pads and towels should not only be cleaned before but also afterwards so that you can use these again some other time.
Special tip – In case you’re left with any abnormal stains or a yellow hint (these yellow stains usually appear if you have used darker nail polish colours like red or black) rub fingernail skin oil also called cubicle oil over the outside of your nails to help any buildup.
2. Trimming your toenails
This step is also very necessary. Most people usually believe that this is not an important step and so most people like to skip this step. But what they don’t realize is that trimming your toenails is not only important for a pedicure at home naturally but trimming is healthy for your toenails. It might sound weird but this is true. Large toenails have more space to contain dirt and all other sorts of impurities. If the dirt particles are not cleaned from time to time, it can actually lead to nail diseases. So, next time you want to do a pedicure at home naturally, make sure that you don’t skip this step. You can use a nail cutter/clipper to trim your toenails. Afterwards, you can use a nail filer to trim down the edges of your nails and making them smoother. The best part about this step is that trimming your toenails doesn’t require you to be a perfectionist or a professional. If you have made any mistake while trimming your toenails, you do not need to worry because these mistakes can be taken care of in the next step.
3. Nail shaping-file your nails as per your choice
This step includes giving shape to your toenails. Your opinion matters the most for this step. After you have trimmed your toenails, now it is time for you to decide what shape do you want your toenails to be. You can shape your nails as per our choice in round or square shape. Whatever is easy for you to maintain. You can use a nail filer to give the desired shape to your toenails. You can also opt to not use a nail filer if you want to maintain the natural shape of your toenails. In this case, you can just use a nail scrubber or a nail buffer to smooth down the edges.
Note – In the meantime add some bath salts or rock salt to the tub of warm water along with few drops of shampoo. A quick tip if you have some infection or just having a malodor add up a few drops of the original Dettol liquid. In this way, it will kill all the germs and give better protection.
4. Soak your feet
Soaking your feet in the tub filled with warm water relaxes your mind, foot muscles, hard, tough skin, and also cubicles. Before soaking your feet apply cuticle softener cream, honey on your nails. now you’re ready to soak in the tub. If you need your pedicure at home with natural ingredients to be simple and easy, you can simply include a cleanser and a couple of precious stones of rock salt into the fluid. If you need to go as far as possible and give yourself that extreme pedicure, this is the thing that you ought to do :
• Include a large portion of some Epsom salt to the water. This will relax and relieve aggravations, diminish any sort of torment, and lessen unpleasantness. It likewise goes about as an exfoliator.
• Include the juice of a whole lemon, and a drop or two of cleaner also.
• You can likewise include a couple of drops of basic oil if you have any at home. These oils normally quiet the nerves and give you a spa-like feeling.
• To turn your home pedicure understanding up a score, you can likewise add smooth stones to give your feet a delicate back rub.
• Now it is time for you to dry your feet with a clean towel.
Note – If you are not able to get your hands on bath salts and rock salts, you can just soak your feet in the warm water without these added ingredients. These things are added in warm water just to give you a more relaxing and home spa-like feeling.
You can soak your feet in the warm water (containing salts or shampoo) for about 20-30 minutes. You can soak your feet for a longer duration if you feel like or if it gives you a more relaxed feeling. Remember to put on some relieving music while you do this. It will go about as an ideal pressure buster. Adding rock salt can also help you get rid of inflammations.
Alert – If you feel any sort of irritation, itchiness or if you notice any sort of redness around your feet, take your feet out of the water immediately.
5. Scrubbing and exfoliating your feet
Exfoliate your feet after soaking, just before exfoliation removes off the cuticle cream. With the help of cuticle pusher. Gently push back your cuticles. You can use a pumice stone to scrub your feet. You can also use a foot file. Exfoliation or scrubbing will help you get rid of dead skin, rough, and dry flakes. You can likewise make use of a nail file rather than a pumice stone. This will evacuate the unpleasant, dry, and dead skin. It is necessary to expel this now and again, otherwise, the skin will solidify, causing splits and disease. While doing this be firm, yet delicate because you need to expel all the skin, yet you would prefer not to hurt yourself.
6. Moisturize your feet
Now that dead skin is removed from feet, we need to lock it with a great and heavy moisturizer to recharge any dampness after scrubbing. The skin around your feet is usually drier and needs more moisturizing thus we have a different range of foot cream available in the market. You may use any marketed foot cream for massaging into your feet. other than this you can use a heavy moisturizer such has Nivea cream or body butter.
Note – Ensure whatever cream you pick isn’t excessively oily. Such a moisturizer will leave the oil on your toenails.
7. Massage your feet
Massaging your feet will relax your muscles and give your feet extra and added a smooth finish. You can give yourself a little foot back rub to mirror the loosening up the sentiment of getting a proficient pedicure at a salon. Utilize a seat or the edge of the shower to hold your foot up as you foam the moisturizing lotion or foot cream among toes and along the curves and mends of your feet. Stir your way up to your calves and wipe out any clusters you may feel waiting from your last exercise.
8. Glam your nails
Glamming your nails, it is the most trending beauty trend today. Add a pop of fresh colour to our nail make them look vibrant and trendy. Right from shiny to matt all various effects can be achieved with a huge range of products available in the market. Do not forget to apply a thin base coat before actually applying the nail polish and also a top coat afterwards.
Special tip – To glam up your nails and to perfectly apply the nail polish, use a toe separator. This tool will ensure that you don’t apply nail polish to your skin.
9. Cleaning up all the mess and smudges
This is the last step and essentially one of the most important steps because after all the efforts you want your nails to look perfect. You can use an orangewood stick or a nail paint remover to clean up all the smudges.
These are the pedicure steps that you can follow to have a pedicure at home with natural ingredients.
Read more : White Spot on Skin,
How to do Facial at home steps
Pedicure at home with natural ingredients
Homemade pedicure scrub recipe
Coconut and salt scrub
You can easily make a pedicure scrub at home with natural ingredients. This scrub can be effective if you do not want to make use of foot scrubs available in the market. This scrub will remove dead skin along with giving a moisturizing effect. You can also use a marketed foot scrub. Explore according to your requirements.
Things needed:
• 1 cup rock salt or sea salt
• ¼ cup of coconut oil (Here you can substitute coconut oil with olive oil or any other oil of your choice)
• ¼ cup of vitamin E oil (If vitamin e is not available just use a vitamin E capsule)
Procedure:
1. Take one cup of rock salt or sea salt and add ¼ cup of coconut oil in it.
2. Mix both of these ingredients until you get a paste.
3. Now add ¼ cup of vitamin E oil or 4-5 capsules of vitamin E in it to make a smooth paste.
Pedicure at home for cracked heels
You can do a pedicure at home naturally for cracked heels. You should always give extra attention to your feet as its the base of your body you have to stand every day on your feet. Due to various stress and dry condition you might also get cracked heels. Cracked heels can be painful at times. Few quick tips to get rid of crack heels:
1. Always clean your heel with a pumice stone or a foot filer.
2. Use a good and heavy moisturizer or your feet
3. Melt a candle in a double boiler and when slightly cool, brush it on the heels and allow it to solidify.
This remedy is best followed at night. Put on cotton socks and go to bed. In the morning, remove the socks and peel off the layer of wax. Follow it daily for a week and you will find a huge difference in the way your feet look and feel.
Pedicure at home with natural ingredients for chipped nails
Chipped nails are also a sign of excessive dry feet, overexposure to nail polish, or due to vitamin deficiency. Coconut oil is very nourishing for weak and brittle nails. The saturated fat in coconut oil works as a great moisturizer. It will also prevent many kinds of nail infections. Often the main culprit behind brittle nails is lack of moisture. Vitamin E oil is a great ingredient to keep your nails conditioned and hydrated. It will also help strengthen and nourish your nails and cuticles. If you notice your nails turned yellow due to regular use of nail color, please let them breathe.
A quick tip: rub lemon slices on the toenails regularly and allow the juice to soak in. This will help you gain the natural color of your nail.
Is it possible to do Pedicure at home? Yes! it can be done easily at home.
Some common doubts regarding pedicure at home naturally
Why are pedicures important or why is it important to do a pedicure at home naturally?
Pedicures help peel your skin, and they additionally help in expelling any callouses on your feet. They will help keep your toenails perfect and clean which will forestall contagious contaminations. Grooming your toenails will keep them from breaking or excruciating chipping. It additionally forestalls dry fingernail skin, hangnails, or broken skin. The process of moisturizing and massaging your feet helps with blooding dissemination, which implies – you’re more averse to create wrinkles on the hands during that time other than taking out any sort of expanding, deadness, or agony. It’s an extraordinary pressure buster. Also, ladies’ feet are for the most part presented to the earth like the kind of footwear is generally open and not shrouded as on account of men. This makes the process of procedure necessary for them so that they can wear their sandals and flaunt their smooth feet.
Are different pedicure machines available for a pedicure at home naturally?
Yes, some pedicure machines are available in the market for a pedicure at home naturally. For a pedicure at home naturally, you can easily buy pedicures machines online and if needed you can also buy tools or full pedicure kit for doing a pedicure at home naturally.
Pedicure home service
We can provide you with various pedicure home services. Some of these are –
- Normal pedicure – ₹250
- D-tan pedicure – ₹400
- Normal spa pedicure – ₹500
- Lotus spa pedicure – ₹600
Now that you have a bunch of tip and tricks do pamper your feet and let us know about your experience. Have happy feet!